When I look in my jewelry drawer, I often think to myself… I should make more of my own jewelry! I can lay in bed at night and think of fantastic ideas, but often run out of time to actually make what I am dreaming about.
So, I have finally gotten my act together and started to make some pieces of my own. I do have them for sale on my Etsy store, but have also given them as personalized gifts to people I care about! I love giving handmade gifts that are one-offs that no one else will have and that no one else can give.
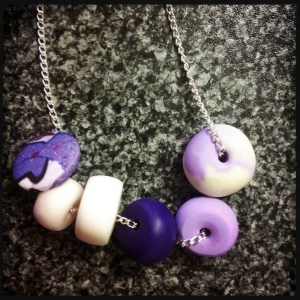
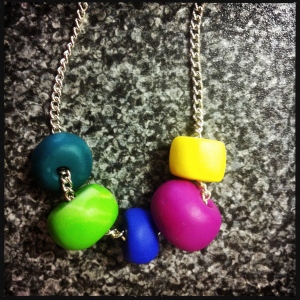
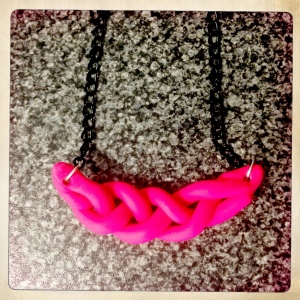
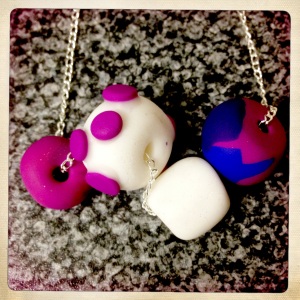
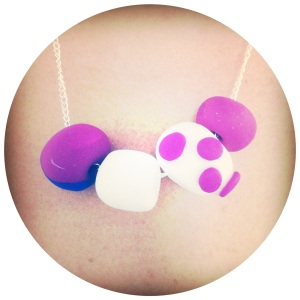
What do you think of the necklaces that I have made so far?
I had heard about this new thing that was like screenprinting, but was much easier, so I wanted to try it!
It is called INKODYE! Instead of exposing a screen, then printing it using a squeegee onto fabric, this formula allows you to just paint it onto the fabric, expose it in the sun for 10 – 20 minutes and Ta Da! It is there!
Check it out!
I was excited because Screenprinting at school has been problematic…. exposing the screen is not always reliable. But this technique is pretty sure fire, and it is great for a one-off print which is what would happen in my classroom.
This is my first experiment, creating a little summer tote bag…. Next time I do it, I would put it in more direct sunlight, and leave it for longer! I think I just got too excited to see the final product! HAHA!
Mask off the area that you are going to paint the dye onto. (This is optional, but I think that it looks neater!) Then paint the dye onto the fabric surface. They recommend that you dilute the dye, but I wouldn’t dilute it next time so that the colour is richer. I also recommend putting newspaper in between the fabric, so that the dye stays on one side of your garment.
STEP FIVE:
Place your image onto the wet surface. The image needs to be made into a film negative. This is done by printing your image into an overhead transparency sheet. I held the image down with a sheet of glass, to make sure there was good contact between the film and the ink.
STEP SIX:
Once this is done, place your garment with the ink and film in the sun for 10 – 20 minutes. (Perhaps longer is better!) And then impatiently wait….
You will notice the dye start to change colour as the chemical reaction occurs.
STEP SEVEN:
Oh my goodness, time to reveal the design!
It looks soooo awesome! I am just imagining what I can do with this process!
STEP EIGHT:
No, it hasn’t ended yet, because we have to rinse it out with special detergent.
Once I did this I was a bit sad because the colour seems to have faded… I hope that next time if I leave the image in the sun for longer, it will bode a better result!
Once it is dry and ironed, I will post up another image to show you the finished product! I can’t wait to try it out some more!
I started this blog with the aim to extend my creativity in my everyday life and force myself to experiment with different approaches to Illustration and Art. Sadly, time has forsaken me… But as I reflect upon this, I realize that while I may not have been pro-actively creating my own Art – I am constantly surrounded by creative forces that enhance my world.
So what have I been doing over the last few months that has quenched my creative thirsts?
This was a really fun day! Even though I didn’t finish the bra that I was making, it was a good experience to have!
2. I have been over-sharing on Instagram
I seem to have an array of photos of the food that I eat and the clothes that I wear…..!
3. I have gone on an #epictrip2012 to Wales, London and Paris
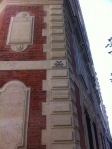
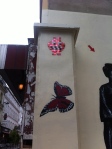
Seeing the sites, shopping and eating wonderful food was a creative expression in itself! I went to all the galleries that I could and admired the array of street art! It was an amazing 3 weeks!
4. I got engaged!
Hidden in my suitcase when I was overseas and engraved with “Will you Marry Me?”
5. I have been guiding my Year 12 students to HSC success
This is probably one of the things that has most taken the creativity from me! I have been giving it to others!!! But, I am very proud of them!
My classroom!
So where does this leave me now?
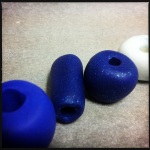
Well…. I have decided to experiment with some Jewelry making and am quite pleased with the progress that I have made!
Here is a sample of my necklace, now available on ETSY!
It was my little sisters birthday last week. She is studying to be a chef.
So, my other sister decided it would be a brilliant idea to have a BAKE OFF for her birthday cake!
Who has a bake off for someone who wants to be be a pastry chef!
So, I took on the challenge! I was going to win! I decided to combine my (minimal) baking skills with my creativity and create something that would blow her away!
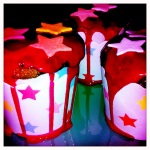
I started by going to the designer kitchen ware shop to get inspiration… and I got these gorgeous patty pans.
When searching for cupcake recipes, I wanted something that WOWed! There were your usual chocolate, blueberry, vanilla ones… but I wanted something that would win the bake off and turn heads… That was when I stumbled across a ZUCCHINI cupcake recipe! As with many children growing up, my little sister did not like this vegetable, especially after my grandma once over boiled it and made her eat it! So, I thought for her birthday, this would be the perfect way for her to overcome this fear!
Thank you to Martha Stewart for the awesome recipe… I did adapt parts and made it my own though! (I put in choc chips and didn’t have walnuts!)
Ingredients
1 1/2 cups all-purpose flour, (spooned and leveled)
Preheat oven to 350 degrees. Line cups of a standard (12-cup) muffin tin with paper or foil liners. Set aside.
In a medium bowl, mix together flour, brown sugar, baking powder, cinnamon, and salt. Mix in nuts.
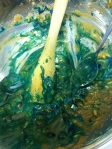
In another bowl, combine zucchini, oil, eggs, and vanilla; add to flour mixture, and mix just until combined (do not overmix).
Divide batter evenly among cups. Bake until a toothpick inserted in the center of a cupcake comes out clean, 40 to 45 minutes.
Cool in tin on a wire rack for 10 minutes; turn cupcakes out, right side up, and cool completely. Meanwhile, make frosting. Using an offset spatula or butter knife, spread frosting on cupcakes. The frosted cupcakes are best eaten within 1 day.
To match the patty pan holders, I put blue food colouring into the mix! It would also hide the colour of the zucchini in the mix.
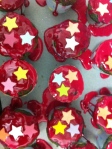
And then it was time to decorate! I went all out!
I think they looked really pretty!
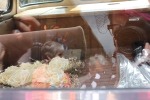
When it came time to compare, I knew I was up for some competition!
Zucchini Cupcakes, Banoffee Pie, Apple Crumble
We made my little sister eat a tasting plate and judge us!
And she ate them… and wouldn’t choose a favourite…
But she did say that mine won for presentation! WOOT!
I have a friend’s wedding coming up…. and while she gave us a lovely registry of gifts, I believe that a present from the heart means a lot more….
For my beautiful friend getting married
However, posting this up may give it away to her…. HAHA
So, I thought what can I give her that is uniquely me? What is something that no one else can give her?
I thought the best thing would be to custom design some fabric for her, and then make this into some cushions. They may not match all her decor, but if there are a few of them, they could become a feature either on her couch or her bed.
I know the colours that my friend likes, so I created this design.
After my exhibition I have had lots of my fabric left over. If I had time I could make a whole dress collection!!
The quirky fabrics are all a part of my ALPHABETISM collection! Each letter of the Alphabet has a matching graphic…
Since November last year I have been creating Cushions using my fabrics. I think they really work because they are bright and crazy prints, but in cushion size, they are enough to highlight a room. I have also been giving them to people as unique handmade gifts!
A is for Aeroplane
E is for Engine
V is for Vacuum and L is for Light
G is for Gnome
Z is for Zombie
P is for Peacock
B is Babushka
And finally… not a part of the previous fabric collection… a fabric that I designed for Christmas…
Wouldn’t you love one of these in your lounge room to add some colour?
run by themusic.com.au , they asked users to design the cover of their next print edition
All you have to do is send us your impression of an artist on the current Big Day Out schedule and upload your entry in the Festivals section of theMusic.com.au (then click onto Big Day Art page).
The prize? Not only will your entry appear on the front cover of Inpress/ The Drum Media/ Time Off, but the lucky winner will also win a pass to the Big Day Out plus CDs by Big Day Out artists. But it gets Bigger and Artier than that! To celebrate the BDO festival’s twentieth anniversary, we are also giving the winner exclusive prints of heritage BDO poster art.
Their suggestion was to run with the ‘handmade theme’ that is reflected in all Big Day Out Promo for 2012.
Instantly I was inspired by Frankie Magazine and their handmade aesthetic.
So I started by doing a watercolour illustration of a jar…
I love the texture and feel that watercolour can give!
To add the Big Day Out artist, I loaded the image into Photoshop and worked some magic….
I don’t really know what they are looking for… but I thought this was a cute idea… having the band in the jar with the label on it… Just like Jam!
I don’t really know what inspired me today… I started doodling a skull and decided he needed a moustache… one thing lead to another and I felt the composition needed some other Vanitas Still Life inspired objects. Thanks to the traditional Dutch masters, I created this illustration.